


Doctor Photo
BAD PHOTOS – 6 BIG MISTAKES YOU MIGHT BE MAKING!
07 February 2019 7983 Views
BAD PHOTOS – 6 BIG MISTAKES YOU MIGHT BE MAKING!
In our last article, we highlighted some really important and shocking stats about the importance of photography…
- Professional-standard photos will increase the perception of a property’s value by thousands. Source: Wall Street Journal
-*Homes with great quality photos sell 32% faster
-*Homes with more photos also help them sell faster – homes with one pic spent an
average of 70 days on the market vs. homes with 20 spent 32 days!
-*Homes between $200k – $1million that had great quality photos vs. those that
didn’t, sold for $3,000 to $11,000 more, too!
*Source: Centre for Realtor Development 2018
At Doctor Photo we get to see tens of thousands of photos every month and those range from the downright beautiful once we’ve buffed them up, to breathtakingly awful. Most of the poor images can still be made better by us, but wouldn’t it be better to get them looking good straight out of the camera so that once polished, they’ll look awesome? At Doctor Photo, that’s what we think, so we’ve come up with some homework for you that could help you get your photos and property marketing on the road to STUNNING!
Let’s take a look at the six most frequent mistakes many agents are making.
-
Bad use of flash. In fact, the best estate agency interiors tend to be taken with no flash. Here’s my own photography site as proof. If you use the camera’s built-in flash, that’s a BIG no-no. What you’ll get is light that’s unevenly distributed and very likely, a ‘dark moon rising’ semi-circular shadow over the lower part of the image. That’ll be the shadow created by your wide-angle lens.
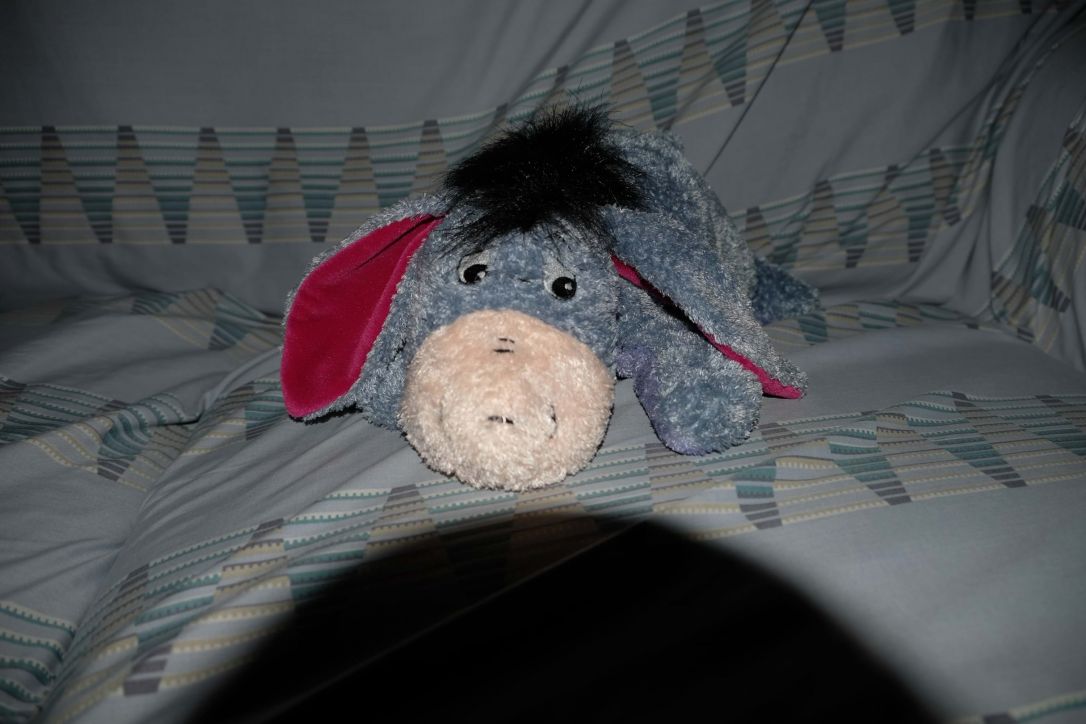
‘Dark-moon-rising’ shadow caused by camera’s own flash and wide-angle lens.
Using a separate flash gun can also prove tricky, creating hot-spots on your ceilings and bogus-looking unnatural shadows. I believe, nothing beats ambient lighting, for the most natural quality interior shots. Ambient, is the lighting you didn’t bring with you.
Another frequent mistake is to use flash outside to brighten up an exterior. Sadly, all that will achieve is a brightened patch on the ground in front of you and flash reflections in the windows. The nerdy explanation for the house not lightening up is termed the Inverse Square Law – look it up. Basically, the further away your subject, (the house), the less illuminated your flash will make it.
If you’re looking for results like mine above, get a decent tripod and perhaps join my workshop.
-
Don’t rely on fully automated camera settings. Your camera will, when you’re using it fully-automated, make really bad decisions for you. It won’t know that you’re using a tripod, so it will try to make the shutter-speed fast in low-light by using settings that will increase your shutter speed. But the camera’s choice of settings will create other issues for your end result – see 3 and 4 below. Instead, use the semi-automated Aperture priority mode – A or AV on your camera. This mode will allow you to select the best aperture to control your camera’s depth-of-field (the sharpness of your image near to the camera and further away) while the camera will select the shutter speed needed to make a correct exposure. You’ll need a tripod because your shutter speeds will mostly be too slow to hand hold the camera. BUT your images will be MUCH better with this setup.
-
Try not to use a high ISO. In low light, your fully-automated camera will choose a high ISO setting. Look around your camera and you should find a button labelled ISO. In AV mode, make sure you know what ISO setting you’re using and take control of it. If your camera or you choose an ISO with a number over 800, this will increase your shutter speed (that’s good when you’re hand-holding your camera if you want to avoid blurry photos), but unless you’re using an expensive SLR, it’s also likely to give you really grainy, horrible results. So, NEVER use Auto ISO and try not to use an ISO higher than 800. Especially, don’t make your images dark if you’re using a high ISO. The darker an image, the less data there will be in it. At the black end of the spectrum there may only be kilobytes instead of megabytes of data stored. The less data there is, the lower the quality.
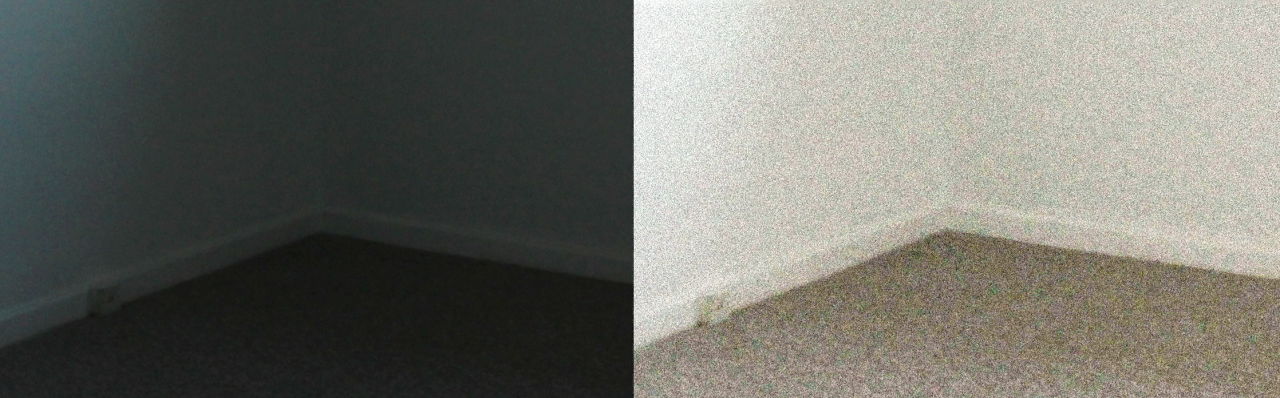
Dark images bad, especially when using high ISO. When lightened, they’ll look fuzzy. -
Don’t use a large aperture unless you’re shooting lifestyle. When fully automated, the camera will give you a large aperture in low-light situations such as a room interior. The larger the aperture, the less sharp parts of your image will look. The term to Google is ‘depth of field’. It’s too big a subject to go into here, but if you master this, it’ll give your images a completely new, sharper look and dimension. Of course, there’s always my workshop. With your wide-angle lens shooting interiors, use F8.
-
Don’t clip your highlights. Clipped highlights is just another
way of saying that where there is white in your image there is zero
data. Sometimes you’ll be taking photos in high-contrast situations
where there’s heavy shadow and white elevations with sun on them. When
that happens, your camera might try to lighten the shadow but at the
same time, it’ll lighten your elevations so that (maybe) windows
will be just be white with no detail. Because there’s zero data in the
white areas, there’s nothing anyone can do to bring them back in
Photoshop. Most cameras have a little button, sometimes on the camera's back or on its top. It'll have a +- symbol next to it. Pressing this while turning the wheel (usually in front of the shutter release) will enable you to make your photos darker. Don't make the shadows too dark though. Doing that would create other problems for your image.
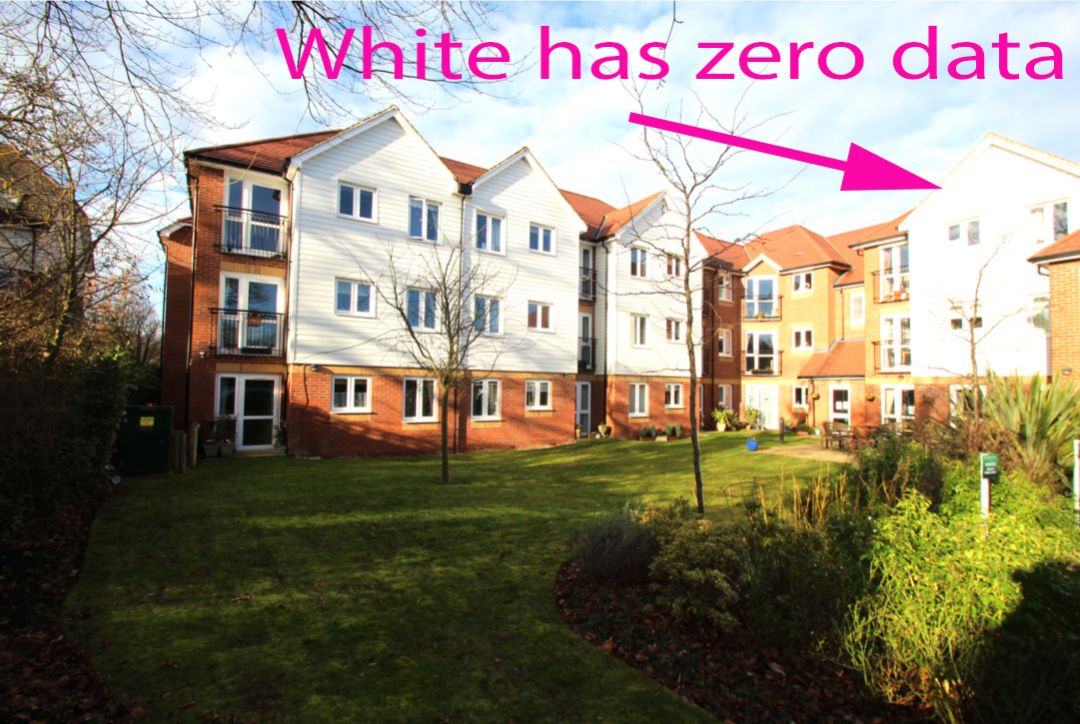
Windows disappearing – too white – zero data, so Photoshop can’t recover them.
There is likely a clipped highlight alert feature on your camera that can prevent you from making that mistake. Many of the people I teach have seen this (flashing black and white on their review screen) but not known its purpose. The location of the feature varies between makes and models, but it’s usually found by pressing the Info button.
-
Taking your photos with the sun shining directly into your lens. If you know it’s going to be sunny, then choose a time of day when the sun, (ideally) is shining directly onto the elevation that you’re photographing. There are phone apps that you can buy to tell you when that will happen. If the main elevation is directly north-facing and it’s winter time, then choose a cloudy day to take the photo. A blue sky can always be added but editing out sun flare can be hideously difficult.
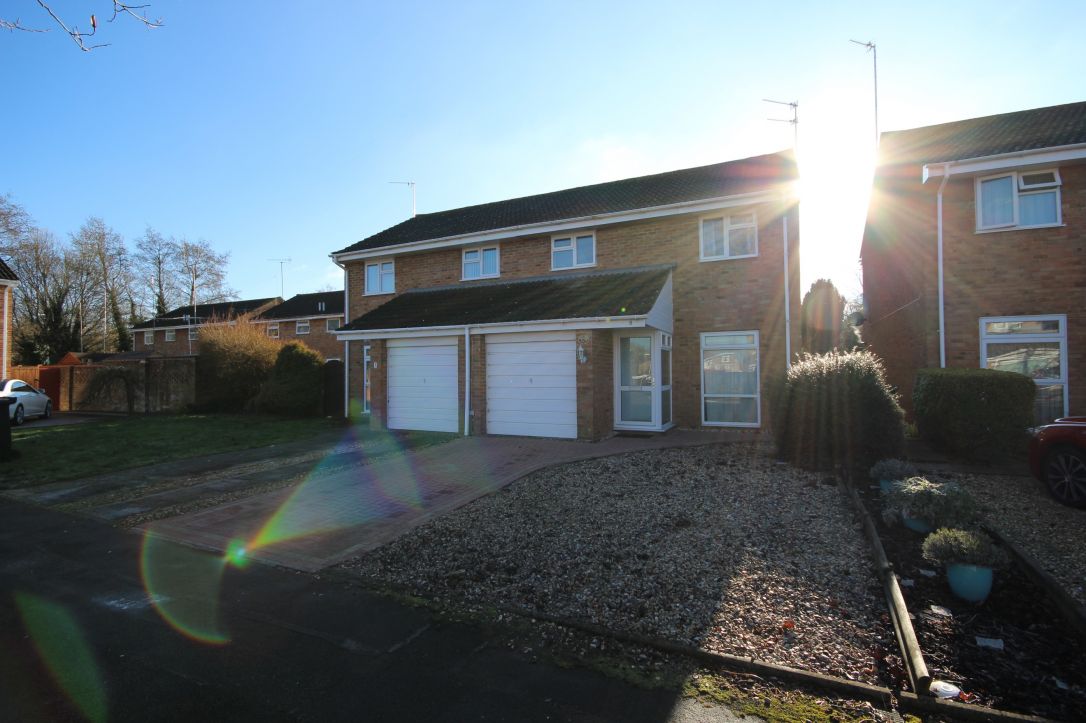
With sun shining directly into your lens, your elevation will be in shade and you’ll also likely get sun flare off your lens
The very first impression you create for all of your properties will likely be determined by how well you photograph your properties. Photography doesn’t involve rocket-science and all of it is easier to master and less dangerous than learning to drive a car. Done well, your photography could propel your brand forward to be the most sought-after in your area for any vendor with a discerning eye. When people are selling properties with £60k kitchens, the last thing they want is their agent making those resemble a display in the London Dungeon. And why would they want that? Why would you spend £1k+ a month advertising your properties on Rightmove with photos that are less than gorgeous?
In my workshop I’ll break all of this down for you into easy-to-grasp chunks. I’ll show you how to get well-exposed interiors and also see what’s outside of windows. How to take great interior and exterior photos and how to do Lifestyle. I’ll also support you forever. If you have any questions afterwards, just call or email and I’ll tell you what you need to know.
Take control of your camera, don’t let it control you. Reap the rewards. Simples!
John Durrant is an award-winning estate agent (37-years) turned high-end property photographer (14-years), author of the RICS Guide to Property Photography and MD of Doctor Photo – the winners of the Best UK Supplier Award (Small). You can contact John at johndurrant@doctor-photo.co.uk
Previous Articles
Funniest Photoshop Requests from 2018...

How to take better property...
4 Reasons Why Virtual Furnishing...
Over 60% of UK consumers...